Cheekyspartan
TNT
- Joined
- Feb 24, 2011
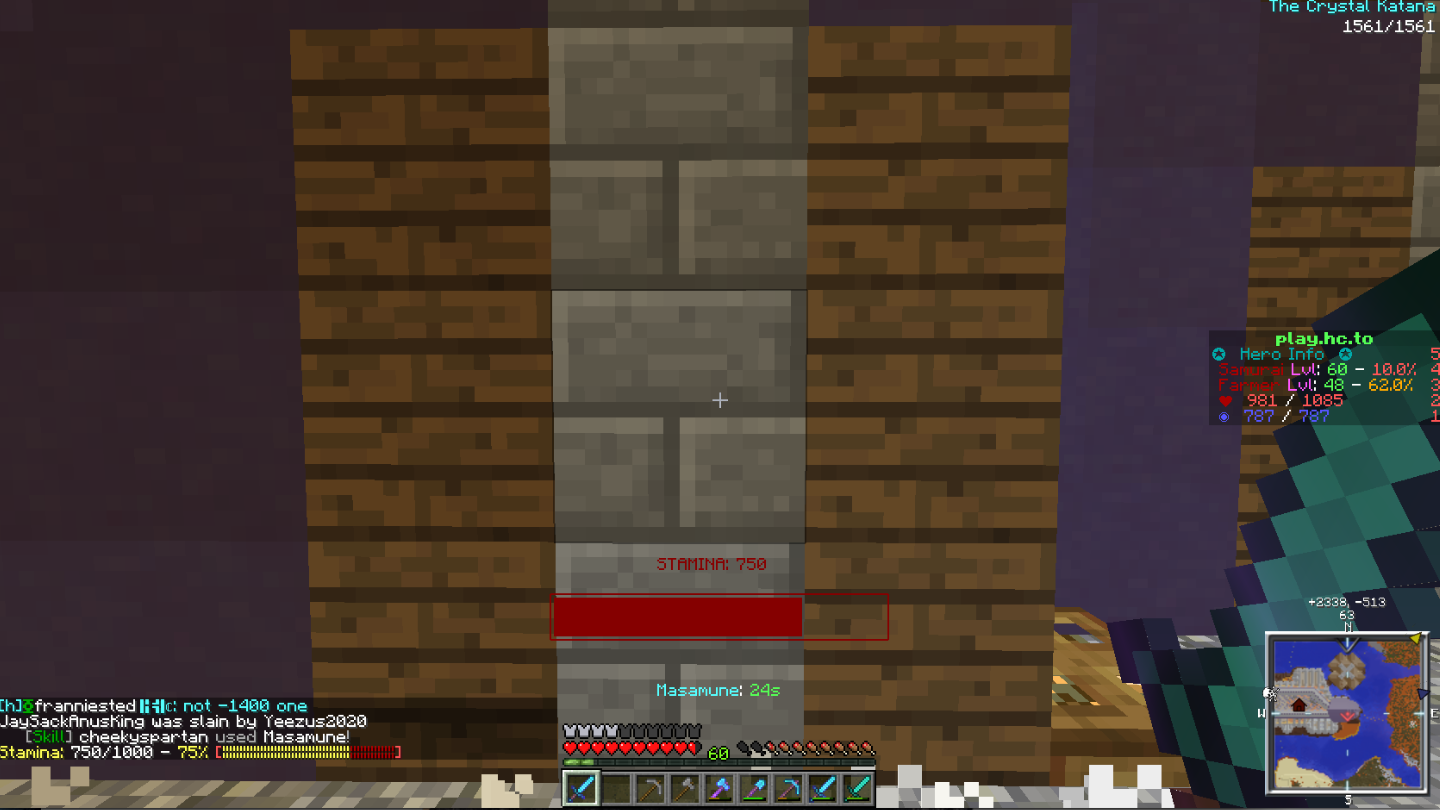
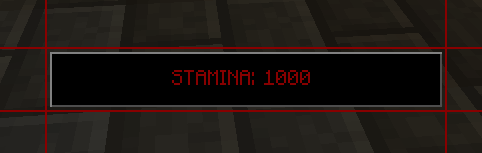
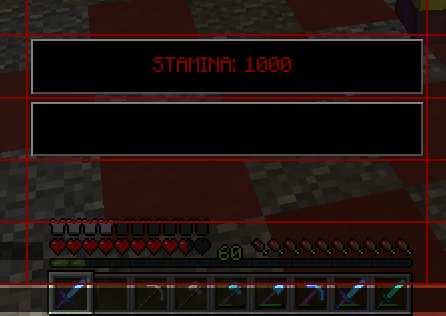
Hello Herocrafters! I'm cheekyspartan, and if you play a class that uses stamina then you're in the right place. This Macro Mod guide will detail the step-by-step process on creating a dynamic stamina bar. You will not need previous training in computer programming to complete this guide. Check out the photo below for the finished product!
Prerequisites:
1: 20 to 30 minutes of free-time.
2: Herocraft Modpack - hc.to/launcher.
3: In the in game chat, make sure your stamina displays upon spell use- To toggle stamina display in chat, type "/hero verbose stamina"
4: Go to the Herocraft Modpack Options Menu>Controls Menu, scroll all the way to the bottom and in the 'Macro/ Keybind Mod' section take note of the keybinding for 'Settings key combo'. This will be useful for quickly switching from gameplay to the Macro Mod menu.
5:Lastly, set your chat to a NON-Global chat like /ch local or /ch shout. If you mess up it is possible to spam chat ALOT! To avoid this I recommend that you read the guide once quickly, and then go through steps in game.
Index:
Commands, buttons, textfields, menus, pop-ups, etc. will be shown in single quotes and colored Blue.
Data, Values, Input, etc. will be shown in green text.
Stamina Bar Guide:
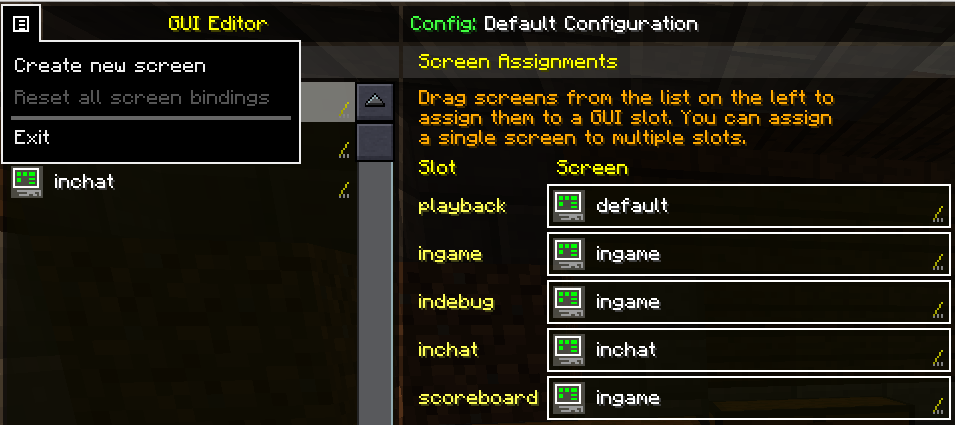
To start off, open up the Macro Mod menu and in the bottom right corner click the 'GUI Editor' button- Looks like crisscrossed tools. Next, create a new screen with the button in the top left corner, as shown below.
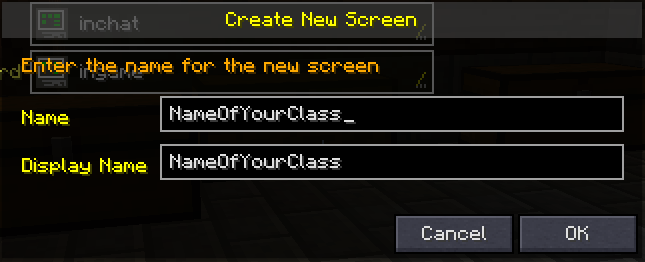
You will be asked to name the new screen, so next to 'Name' put in the name of your current class- Use the same name for the 'Display Name'. This will ensure for easy swapping when changing classes in the future.
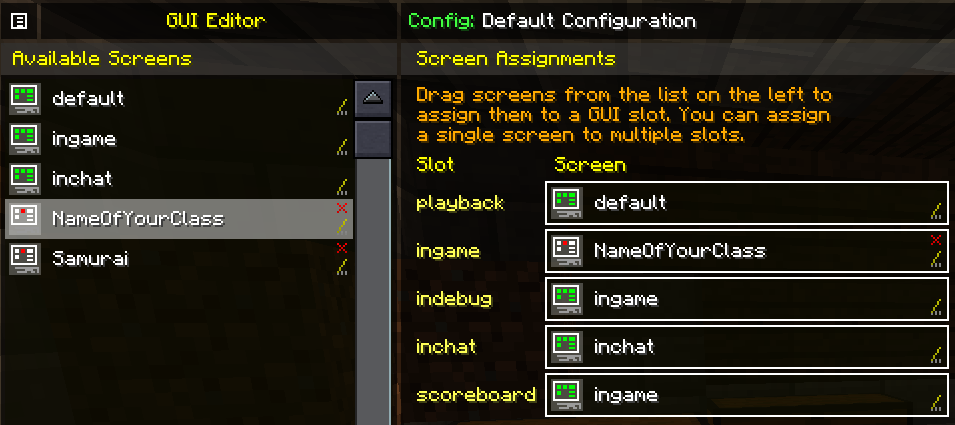
Now click 'OK', and the screen you've created will show up in the left hand bar under 'Available Screens'. Click and drag it in to the 'ingame' screen slot. In doing so, your screen will display during gameplay.
Under 'Available Screens' double click the same screen that you dragged in to the 'ingame' screen slot. This will open up the editing window and allow you to edit what will display while playing.
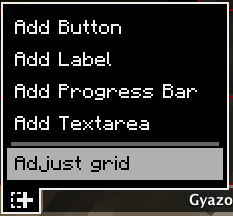
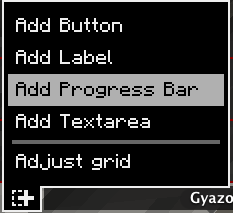
In the bottom left corner, click 'Button Panel Commands'- Looks like a + symbol. In this menu, choose 'Adjust grid'.
Bring up the Number of Rows to 14 and Columns to 7 with the green '>' buttons. Do NOT click 'OK' yet. There is still more to do with grid settings.
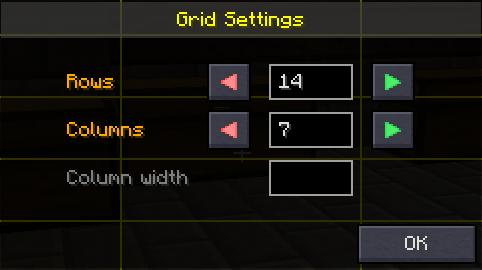
*(If you have a lower resolution monitor you can skip this step, and just press 'OK' to confirm your grid settings)*
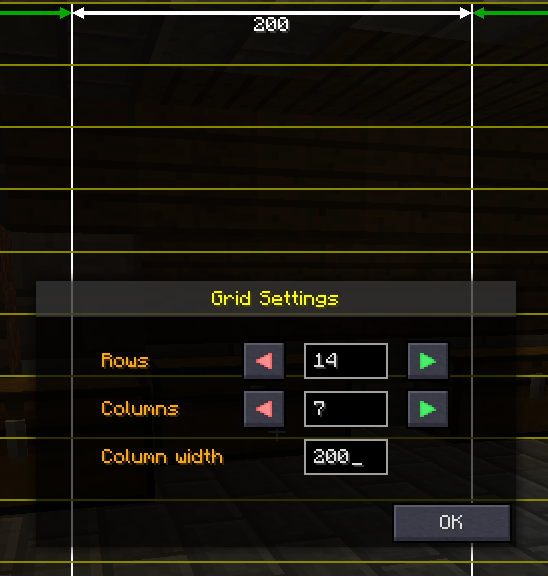
Click anywhere inside the middle column and the 'Column width' text area will become useable. It will change from gray to gold in color. Change this value in this field to 200 . Now use the 'OK' button to confirm your Grid Settings.
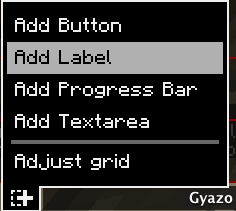
Add a label to your screen with the 'Button Panel Commands' button. Select 'Add Label'.
Place it in the middle column, near the bottom of your screen (sorry for the bad cropping, I placed mine in the fourth cell from the bottom).
When you place the Label, its 'Properties' window will pop up with a few different text fields and color choices. The values are as follows: 'Control Name' stamina, 'Label text' STAMINA: 1000, 'Binding' , 'Text Align' Middle Centre, 'Shadow' unchecked. Do NOT click 'OK' yet. Once you finish the color settings you can click 'OK' to confirm your Label properties. (See Next 2 steps for color settings).
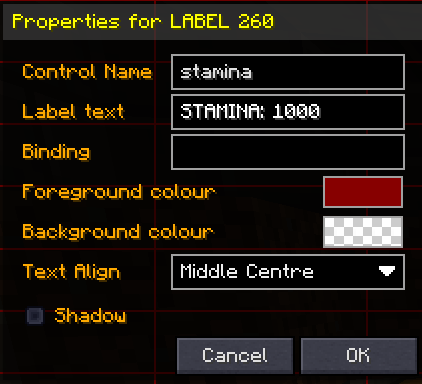
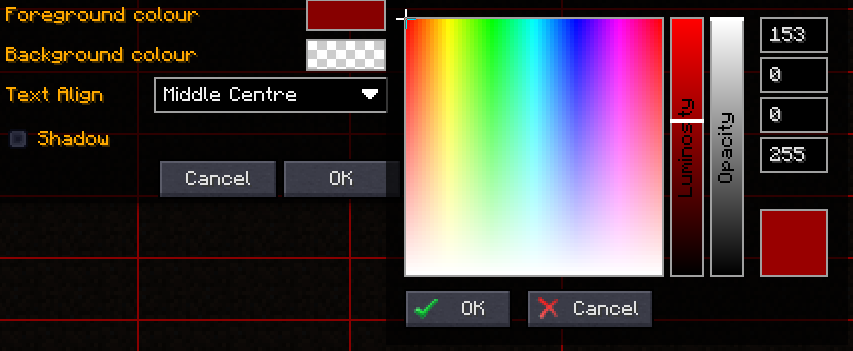
'Foreground Color' Red 'Opacity' 255 *(The color can be changed to your liking. I chose red, but use whatever )*
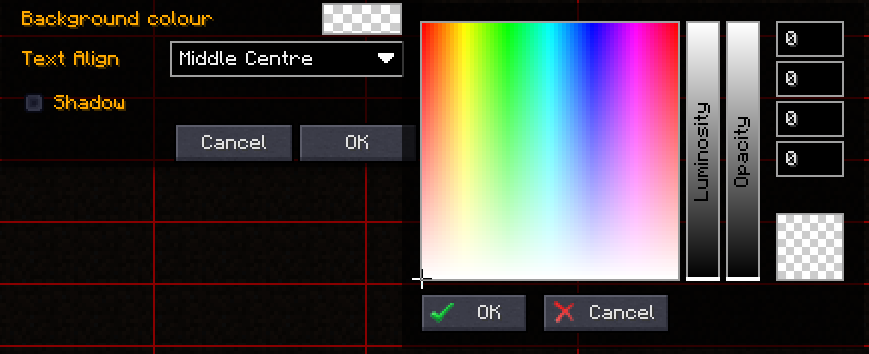
'Background color' any, 'Opacity' 0
Next, add a progress bar to your screen with the 'Button Panel Commands' button. Select 'Add Progress Bar'.
Place it in the middle column, just under your Label.
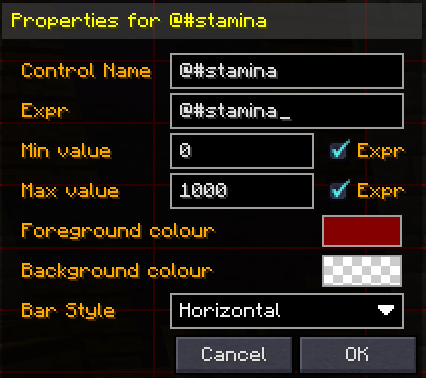
Now the 'Properties' window will pop up for the Progress Bar. This has similar choices to the Label properties. The values are as follows: 'Control Name' @#stamina, 'Expr' @#stamina, 'Min value' 0, 'Max value' 1000, 'Expr' checked, 'Expr' checked, 'Bar Style' Horizontal. Do NOT click 'OK' yet. Once you finish the color settings you can click 'OK' to confirm your Progress Bar properties. (Refer to the same 2 steps for color settings as the color settings for the Label).
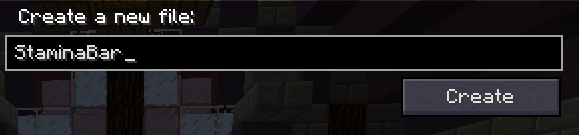
Now press escape twice to return to the 'Macro Bindings' page. In the bottom left corner of the page, click the 'Text Editor' button- Looks like 3 periods followed by a typing cursor. In the text field at the top, type in StaminaBar and press 'create'.
In this text file window, you can copy and paste the code below right into the file. Once you've copied it, check that it looks the same as the picture under this code.
Compare your text file to the image below. Once you've confirmed that they're identical, press save.

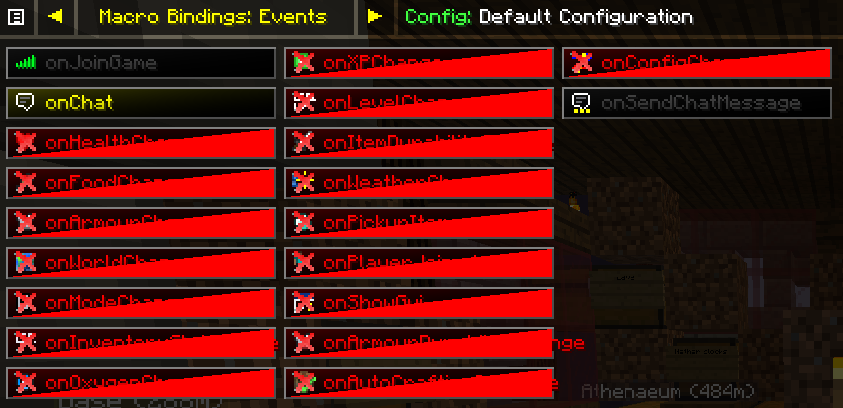
You will now be back at the 'Macro Bindings' page. From here, use the '>' arrow button in the top left of the screen to open up the 'Bindings: Events' page. Click 'onChat'.
In the bottom text field of this macro page, copy and paste this code below.
Make sure it matches this image, and then press 'Save' to confirm.
At this point you can escape out of the macro menus and should have a fully working stamina bar with a text label to display the exact value. They should both change simultaneously, and dynamically upon stamina use.
Thank you for reading! This guide has been brought to you by, cheekyspartan. This is my first Herocraft guide, so please post any and all suggestions and comments- positive and negative.
Prerequisites:
1: 20 to 30 minutes of free-time.
2: Herocraft Modpack - hc.to/launcher.
3: In the in game chat, make sure your stamina displays upon spell use- To toggle stamina display in chat, type "/hero verbose stamina"
4: Go to the Herocraft Modpack Options Menu>Controls Menu, scroll all the way to the bottom and in the 'Macro/ Keybind Mod' section take note of the keybinding for 'Settings key combo'. This will be useful for quickly switching from gameplay to the Macro Mod menu.
5:Lastly, set your chat to a NON-Global chat like /ch local or /ch shout. If you mess up it is possible to spam chat ALOT! To avoid this I recommend that you read the guide once quickly, and then go through steps in game.
Index:
Commands, buttons, textfields, menus, pop-ups, etc. will be shown in single quotes and colored Blue.
Data, Values, Input, etc. will be shown in green text.
Stamina Bar Guide:
To start off, open up the Macro Mod menu and in the bottom right corner click the 'GUI Editor' button- Looks like crisscrossed tools. Next, create a new screen with the button in the top left corner, as shown below.
You will be asked to name the new screen, so next to 'Name' put in the name of your current class- Use the same name for the 'Display Name'. This will ensure for easy swapping when changing classes in the future.
Now click 'OK', and the screen you've created will show up in the left hand bar under 'Available Screens'. Click and drag it in to the 'ingame' screen slot. In doing so, your screen will display during gameplay.
Under 'Available Screens' double click the same screen that you dragged in to the 'ingame' screen slot. This will open up the editing window and allow you to edit what will display while playing.
In the bottom left corner, click 'Button Panel Commands'- Looks like a + symbol. In this menu, choose 'Adjust grid'.
Bring up the Number of Rows to 14 and Columns to 7 with the green '>' buttons. Do NOT click 'OK' yet. There is still more to do with grid settings.
*(If you have a lower resolution monitor you can skip this step, and just press 'OK' to confirm your grid settings)*
Click anywhere inside the middle column and the 'Column width' text area will become useable. It will change from gray to gold in color. Change this value in this field to 200 . Now use the 'OK' button to confirm your Grid Settings.
Add a label to your screen with the 'Button Panel Commands' button. Select 'Add Label'.
Place it in the middle column, near the bottom of your screen (sorry for the bad cropping, I placed mine in the fourth cell from the bottom).
When you place the Label, its 'Properties' window will pop up with a few different text fields and color choices. The values are as follows: 'Control Name' stamina, 'Label text' STAMINA: 1000, 'Binding' , 'Text Align' Middle Centre, 'Shadow' unchecked. Do NOT click 'OK' yet. Once you finish the color settings you can click 'OK' to confirm your Label properties. (See Next 2 steps for color settings).
'Foreground Color' Red 'Opacity' 255 *(The color can be changed to your liking. I chose red, but use whatever )*
'Background color' any, 'Opacity' 0
Next, add a progress bar to your screen with the 'Button Panel Commands' button. Select 'Add Progress Bar'.
Place it in the middle column, just under your Label.
Now the 'Properties' window will pop up for the Progress Bar. This has similar choices to the Label properties. The values are as follows: 'Control Name' @#stamina, 'Expr' @#stamina, 'Min value' 0, 'Max value' 1000, 'Expr' checked, 'Expr' checked, 'Bar Style' Horizontal. Do NOT click 'OK' yet. Once you finish the color settings you can click 'OK' to confirm your Progress Bar properties. (Refer to the same 2 steps for color settings as the color settings for the Label).
Now press escape twice to return to the 'Macro Bindings' page. In the bottom left corner of the page, click the 'Text Editor' button- Looks like 3 periods followed by a typing cursor. In the text field at the top, type in StaminaBar and press 'create'.
In this text file window, you can copy and paste the code below right into the file. Once you've copied it, check that it looks the same as the picture under this code.
Code:
IFMATCHES(%CHATCLEAN%, "Stamina: (.+?)/1000", &stam, 1);
     SET(@#stamina, %&stam%);
     SETLABEL(stamina, "STAMINA: %&stam% ");
     FILTER();
ENDIF;
Compare your text file to the image below. Once you've confirmed that they're identical, press save.
You will now be back at the 'Macro Bindings' page. From here, use the '>' arrow button in the top left of the screen to open up the 'Bindings: Events' page. Click 'onChat'.
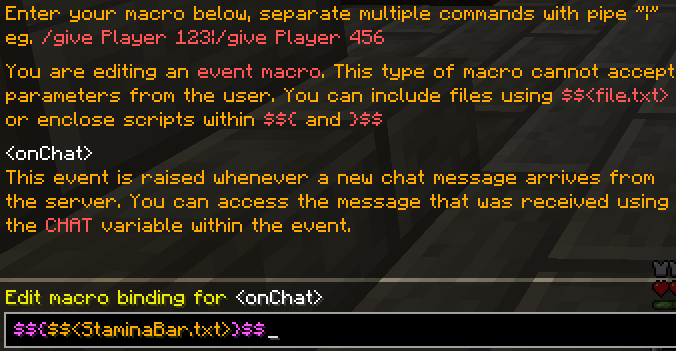
In the bottom text field of this macro page, copy and paste this code below.
Code:
$${$$<StaminaBar.txt>}$$Make sure it matches this image, and then press 'Save' to confirm.
At this point you can escape out of the macro menus and should have a fully working stamina bar with a text label to display the exact value. They should both change simultaneously, and dynamically upon stamina use.
Thank you for reading! This guide has been brought to you by, cheekyspartan. This is my first Herocraft guide, so please post any and all suggestions and comments- positive and negative.
Last edited: